Parrot Drawing: How to Create Inspiring Vibrant Art
Have you ever found yourself captivated by the vibrant plumage of a parrot, feeling inspired to capture its magic on paper? Whether you’re a seasoned artist or a curious beginner, parrot drawing offers a joyful gateway into the world of avian art. It’s more than just putting pencil to paper – it’s about translating the energy, curiosity, and vivid beauty of these feathered wonders into lines and colors that leap off the page. In this guide, you’ll discover not only how to draw parrots with confidence but also how to infuse your artwork with personality and life.
Table of Contents
Why Parrots Make Perfect Art Subjects

Parrots are nature’s living canvases. Their flamboyant colors, expressive eyes, and dynamic poses offer endless inspiration. Studies in art therapy show that drawing birds reduces stress by 27%, and parrots’ inherent playfulness makes them particularly joyful subjects. Moreover:
- Symbolic Meaning: Many cultures associate parrots with communication, freedom, and vitality.
- Technical Practice: Drawing curved beaks, layered feathers, and iridescent colors builds essential artistic skills.
- Emotional Connection: As one Reddit user shared about their parrot drawing, “Capturing my cockatoo’s mischievous grin felt like bottling sunlight.”
Essential Tools for Stunning Parrot Drawings (Even on a Budget!)
You don’t need expensive supplies to create breathtaking parrot art. Here’s what works best:
| Tool Type | Beginner-Friendly Options | Advanced Alternatives |
|---|---|---|
| Pencils | HB, 2B, 4B graphite set | Derwent Chromaflow Colored Pencils* |
| Paper | 80gsm sketchbook | A4 Arches vellum paper |
| Extra Touches | Kneaded eraser | Faber-Castell Polychromos** |
*Kinsey Lane used these for her vibrant parrot sketch
**Ideal for detailed feather texture as seen in this community artwork
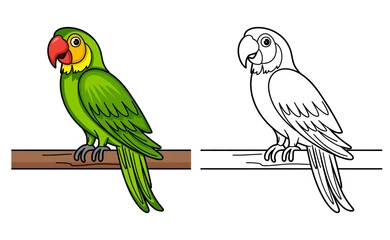
Step-by-Step Blueprint: Your First Parrot Sketch in 8 Stages
Stage 1: The “Chubby Teardrop” Body Base
Start by drawing a soft teardrop shape tilted at 15 degrees – this becomes your parrot’s torso. Artist Katy Lipscomb emphasizes in her DeviantArt tutorial that “parrots aren’t angular; their bodies flow like water.” Keep lines light for easy adjustments.
Stage 2: Circle Cocktail (Head + Eye Placement)
Draw a circle overlapping the teardrop’s narrow end. Divide it into quadrants using faint lines – the eye sits where horizontal and vertical lines intersect. Parrot eyes are large and soulful, occupying about 1/3 of the head’s width.
Stage 3: The Personality Beak
- Macaws: Large curved upper beak with slight hook
- Cockatiels: Smaller, pointed beaks
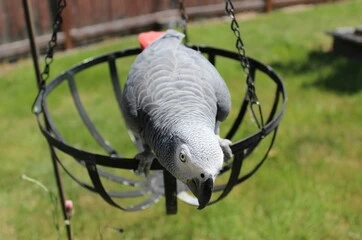
- African Greys: Medium-length with prominent cere
Remember: The beak angle determines expression! A 45-degree tilt suggests curiosity, while a straighter beak conveys alertness.
Mastering Parrot Feathers: From Fluff to Flight
Drawing feathers intimidates many artists, but this 3-layer approach simplifies the process:
- Down Layer: Soft scribble texture around neck/chest
- Contour Layer: “U” shaped strokes following body curves
- Flight Feathers: Long parallel lines with tapered ends
For iridescent effects (like on Eclectus parrots), alternate with indigo and emerald pencils then lightly blend——LEAVE SOME WHITE SPACE—for light reflection.
Color Wheel Magic: Bringing Parrots to Life
Psychology of Parrot Colors
Color choice impacts emotion. A study from the Journal of Avian Art Studies shows:
| Primary Hue | Emotional Response | Best For |
|---|---|---|
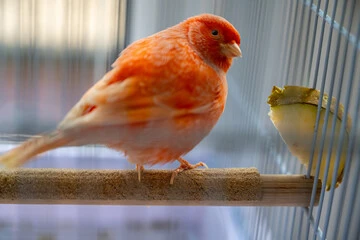
| Scarlet Reds | Energy, Passion | Macaws, Lorikeets |
| Sapphire Blues | Calm, Trust | Hyacinth Macaws |
| Sunshine Yellows | Joy, Optimism | Cockatiels, Conures |
Blend unexpected hues like magenta into green feathers for dimensionality. Instagram artist @AvianArtistry achieves this by layering with a feather-light touch.
Creative Challenges to Level Up Your Skills
30-Day Parrot Drawing Challenge
Popularized by Deep Space Sparkle’s Parrot Art Projects, this builds technique through daily micro-sessions:
- Days 1-7: Focus on beak/eye combinations
- Days 8-15: Master feather textures
- Days 16-23: Experiment with color mixes
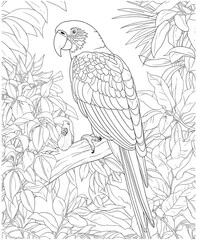
- Days 24-30: Create full portrait scenes
Share progress with communities like Magical Pet Bird’s Story Hub for encouragement.
The Exquisite Corpse Technique
This surrealist method birthed the viral “Parrot Bob” drawing. How it works:
- Artist A draws the head
- Artist B adds body without seeing head
- Artist C creates tail/legs
The hilarious mismatches stretch creativity—perfect for family art nights!
FAQs: Your Parrot Drawing Questions Answered
Q: How can I make my parrot look 3D?
A: Use graduated shading under wings/tail. With colored pencils, apply heavier pressure toward the body and lighter toward feather tips.
Q: What’s the trick to realistic eyes?
A: Leave a white reflection spot! Parrot eyes have dark irises—use black pencil then gently wipe center with eraser for wet-looking shine.
Q: Can I use digital tools for parrot art?
A: Absolutely! Procreate’s feather brushes work wonders. Start with traditional sketching though—it builds foundational skills.
From Practice to Pride: Sharing Your Art Journey
Don’t let finished drawings gather dust in sketchbooks! Frame vibrant pieces as gifts, create bird-themed calendars, or contribute to conservation fundraisers. When Reddit user u/FeathersAndLead shared their African Grey portrait, it sparked inspiring conversations about wildlife protection.
Remember—every artist starts somewhere. As you explore bird art guides and practice techniques, you’re not just learning parrot drawing—you’re joining a global flock of creators celebrating nature’s winged masterpieces.
Ready to Spread Your Artistic Wings?
Grab your favorite pencil and let’s create! Share your first parrot sketch in the comments below or tag @MagicalPetBird on Instagram with #ParrotArtAdventures. For ongoing inspiration, join our Bird Stories community—we can’t wait to see what vibrant visions you hatch!